Using nib2cib with Xcode 4
Jun 19, 2011
Tags: xcode, cappuccino
The general wisdom if you're using the excellent Cappuccino web framework is that you needed Xcode 3's Interface Builder (IB) to build xib files for use with Cappuccino. The reason being that in IB you could define the inlets and outlets on the controller class in the xib file. So Cappuccino could create you a template xib, you can open it up in IB, add the controls, define the inlets/outlets on the AppController class, and then save it all and run nib2cib to generate the cib file cappuccino will load.
Come Xcode 4, there is no longer an independent Interface Builder, it's all in the same IDE as your code. As such, to define inlets/outlets on a class you do that in code now, rather than in the integrated equivalent of IB. So all is lost - you can't just definite everything in a stand alone xib. At least, as a new comer to Cappuccino that's what I hear a lot of.
But it's not true - although the process is a bit messier, you can create Xib files in Xcode 4 and have them work with Cappuccino. All that you need is a little more effort. Here's the steps I've taken to demo this:
Step 1: Create the template code
Using the terminal, create a directory to hold both your cappuccino project and your Xcode 4 project you'll need to make:
% mkdir ProjDir
% cd ProjDir
Now create your Cappuccino project:
% capp gen -t NibApplication MyApp
In Xcode 3 world that'd be all you need to do, but in Xcode 4 world we need to have an Xcode 4 project in which to work with our xib file, so let's create a place for that:
% mkdir xcode4
The next step is to fire up Xcode 4, and create a new Mac OS X Cocoa Application project. So open Xcode 4, select File -> New -> New Project... and the select "Cocoa Application" under the Mac OS X section and click Next. Call the Product Name "MyApp", and turn off pretty much everything like Core Data and Unit Tests - you'll not be needing them, so why clutter our project? Once you've done that, click Next again. Now you'll be asked to pick a folder to save your project in - pick the xcode4 folder we created above, and click Create.
Now we've created all the templates we need, we need to do a little rewiring to make things work.
Step 2: Making links to make us happy
Now, both the cappuccino project and the Xcode 4 project have a xib file in them, but we only need one. My first approach was to remove one and start using links in the file system to have cappuccino reference the one in the xcode project, but between them nib2cib didn't like symbolic links and Xcode 4 defeated my hard links, so I resorted to copying the xib file into the right place each time and building it.
Go back to the terminal you had open (or if you closed it, go back to the ProjDir directory). Then find and remove the Cappuccino project's xib file:
% cd MyApp/Resources
% rm MainMenu.xib
Now each time you want to compile the xib into a cib file do this:
% cp ../../xcode4/MyApp/MyApp/en.lproj/MainMenu.xib .
% nib2cib
I've put this into a shell script to automate it. It's not pretty, but it works reliably. If you look in the Resources directory you should now see the newly generated cib file.
That's all the file system munging we need to do. From now on, whenever you update the xib file in Xcode 4, change into the ProjDir/MyApp/Resources directory and run nib2cib.
Step 3: Matching the app delegate class in Cappuccino and Xcode 4
The last bit of fiddling you need to do is in code. You need to make sure the application delegate class used in the xib has the same name in both Xcode 4 and your Cappuccino project, so that when the cib is loaded in Cappuccino the run time can find the right class. The easiest way to do this is just to rename the AppDelegate class in Cappuccino to match the one in Xcode 4.
If you look in Xcode 4 you'll see that the app delegate class there is called MyAppAppDelegate - copy that name and find AppController.j in your Cappuccino project, and then rename the AppController class to MyAppAppDelegate. You'll also need to rename the "theWindow" variable to match the outlet used in the xib, which has the name "window". The resulting class declaration should look a little like this:
@implementation MyAppAppDelegate : CPObject
{
  CPWindow    window;
}
You'll also find "theWindow" used otherwhere in the code, so make sure you correct those instances too.
And that should be it. If you remembered to run nib2cib earlier, you should just be able to open index.html and you'll find the app starts with a menu bar and empty window in it.

I've commented out the setFullPlatformWindow: call in awakeFromCib: for that screen shot, so as to make it more obvious what's happening here.
Step 4: Making things more interesting
Now we want to add some more functionality to our app, so let's add a text field and button, and get them working in Cappuccino. To do this you're going to have to update both MyAppAppDelegate.h in Xcode 4 and AppController.j in Cappuccino to have the outlets you want. This is where in IB you'd have just added the inlets/outlets to the class in there, but in Xcode 4 you need to do it by hand. But the end result is the same.
Head over to Xcode 4, and add a NSTextField outlet and an IBAction handler to the MyAppAppController definition in the header file:
#import <Cocoa/Cocoa.h>

@interface MyAppAppDelegate : NSObject <NSApplicationDelegate> {
@private
   NSWindow *window;
   NSTextField *textField;
}

@property (assign) IBOutlet NSWindow *window;
@property (assign) IBOutlet NSTextField *textField;

- (IBAction)buttonPressed: (id)sender;

@end
Now click on MainMenu.xib, bring up the Window, and add your text field and a button. Once you've added them, link them to the respective inlet and outlet on the app delegate object, and make sure you've saved everything.
Having done that, we now need to rerun nib2cib. Go back to the terminal, make sure you're in the Resources directory, and rerun nib2cib.
Finally, let's make something happen in the Cappuccino work.
First, we need to add the text field outlet on our MyAppAppDelegate class, and the result should look a little like this:
@implementation MyAppAppDelegate : CPObject
{
   CPWindow    window;
   CPTextField textField;
}
Once you've done that, add a method to handle the button press. We'll make it write some obvious text into the text field:
- (void)buttonPressed: (id)sender
{
   [textField setStringValue: @"Hello, world!"];
}
Now reload your index.html and hit that button :)
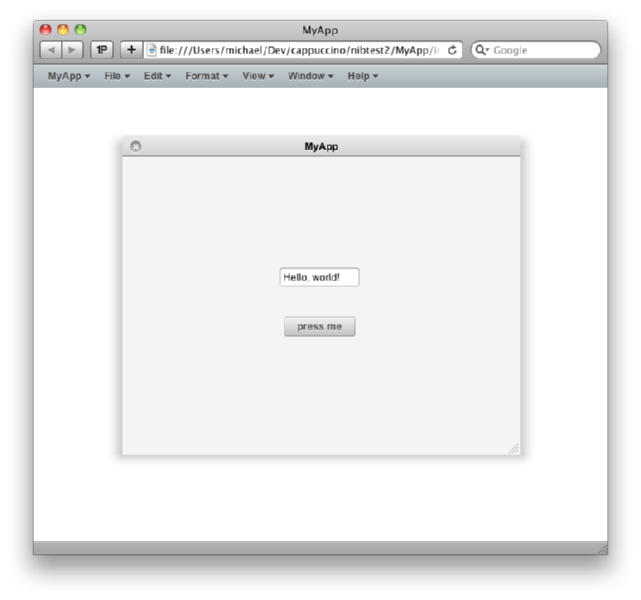
Wrapping up
So, that wasn't as pretty as under Xcode 3, but once set up all you need to do is keep the app delegate header file in the Xcode 4 project up to date, and you're able to crack on. And for all the setup effort, it's better than specifying everything with CGRectMake everywhere!